Lunar ground
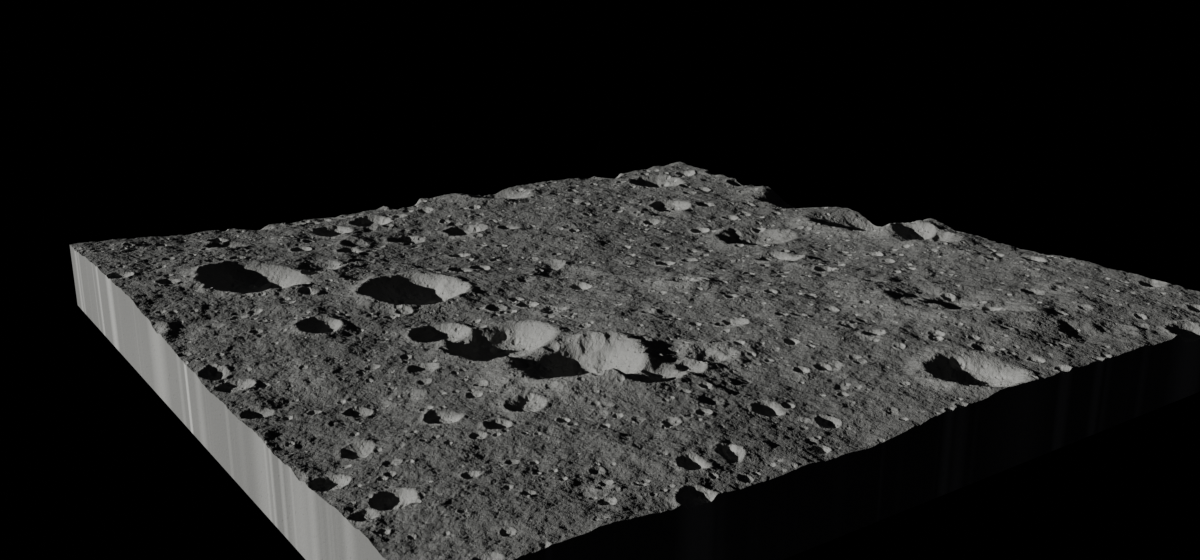
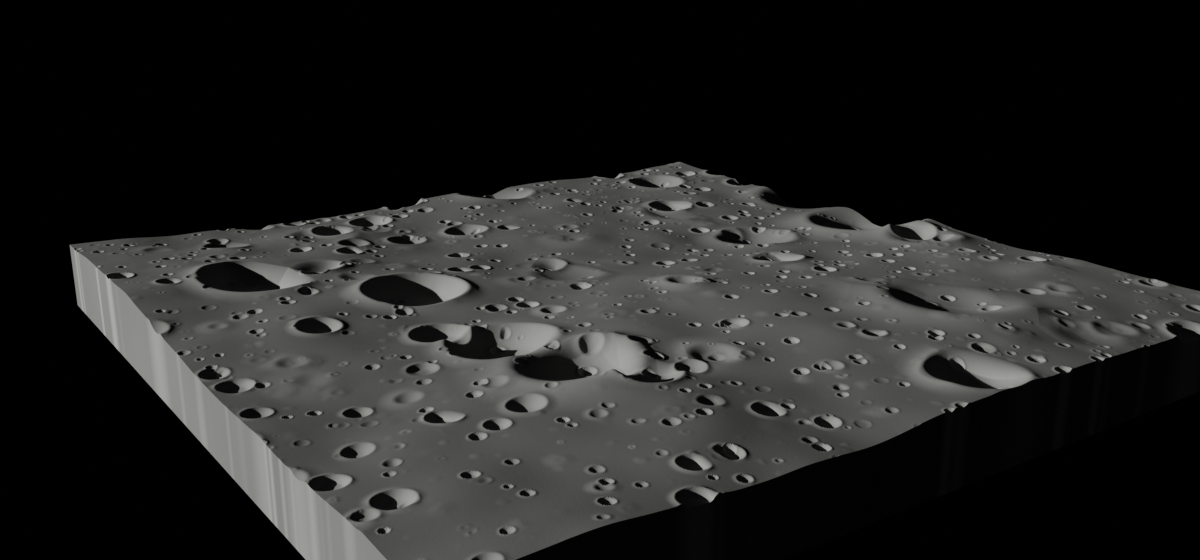
A square of Moon, four metres a side: a rolling plain, craters from half a metre down to a few millimetres, grey dust. Geometry Nodes moves the vertices to dig the craters. A material adds what is too small for vertices and gives the colour.
Before you start
You need Blender 5 and the Base Node add-on. Every step below is a complete .bn file. Two ways to try one:
- Drag it. Drag the file icon of its block, or its title, from the page onto empty space in Blender's 3D Viewport. The add-on's dialog shows the step's title and picks Instantiate the Example: a new object carries
lunar_groundat the 3D cursor. A click on the file icon downloads the file instead. - Paste it. Press the copy button of its block, open a Geometry Node editor, press Ctrl+Shift+V and pick Add as Modifier, on any mesh object: the graph makes its own ground and ignores the mesh it is given.
The head of each file, its // @ lines, tells Blender what the file is: its name, its title, and what it offers when dropped (its groups, and lunar_ground as the example to instantiate).
Each block holds the whole file of its step, its code beside the nodes it builds. It opens on the graph the step adds or changes; the other graphs of the file are in the menu at the top of the block.
Hover a node to find its line, drag to pan, scroll to zoom.
The pictures are rendered from these exact files by render.py, with the camera and the sun of the last section.
1. A plain that rolls a little
Start with a flat square and lift each vertex by a noise. Grid makes 800 × 800 vertices over 4 m, one every 5 mm: enough for the small craters of step 5.
step1_plain.bn: lunar_ground
NoiseTexture(…).factor gives a value between 0 and 1 that wanders around 0.5. Subtracting 0.5 centres it on zero, so the ground goes down as much as up.
Multiplied by 0.3, it moves a few centimetres. A scale of 0.4 makes about two hills across the square.
SetPosition(offset: …) adds the height to each vertex's position; CombineXYZ(z: …) puts it on the Z axis only.
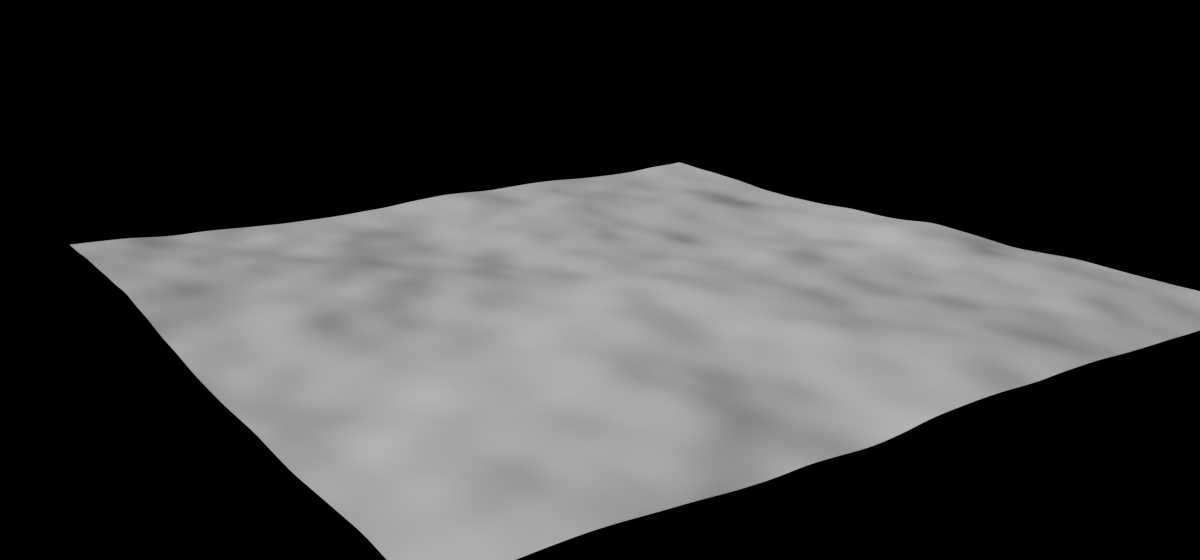
Try: set the noise scale to 3.0. The hills get smaller and more numerous, at the same height.
2. One crater, from three curves
Cut a crater through its centre and you get a curve: a bowl, often with a flat floor, and a raised rim that slopes down to the plain.
We describe this curve once, for a crater of radius 1, with x the distance from the centre counted in radii: x = 0 at the centre, x = 1 on the rim.
Any crater is then this curve, stretched to its radius.
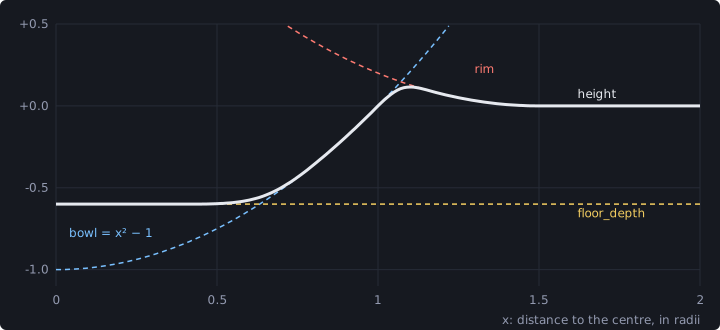
crater_profile with its default inputs, drawn from the same formulas by profile.py.- The bowl,
x * x - 1.0: −1 at the centre, 0 atx = 1, and above 0 further out. - The floor. Large craters have a flat floor. A maximum with
floor_depth(−0.6) cuts the bottom of the bowl: where the bowl is lower than −0.6, the floor wins. - The rim:
outsideisx − 1.5, or 0 pastx = 1.5. Its square, timesrim_steepness, is 0.2 atx = 1and falls to 0 atx = 1.5. - A minimum of the floored bowl and the rim gives the crater. Inside, the bowl is the lower of the two. Past the rim, the bowl climbs and the rim is lower. Past 1.5 the rim is 0: the plain.
A plain minimum leaves a sharp crease where two curves cross. The Math node's Smooth Maximum and Smooth Minimum round it over a width of smoothness: a crest instead of an edge.
step2_crater.bn: crater_profile, lunar_ground
In lunar_ground, flat keeps X and Y of the position and drops Z: length(flat) is the distance on the ground to the centre of the square.
Divided by the radius, it is the x of the profile. The profile goes from −1 to 0.2, so we multiply it by the radius to get metres, and by depth.
With the floor at −0.6 and a depth of 0.5, the floor lies 0.3 radius down, 24 cm for this 80 cm crater.
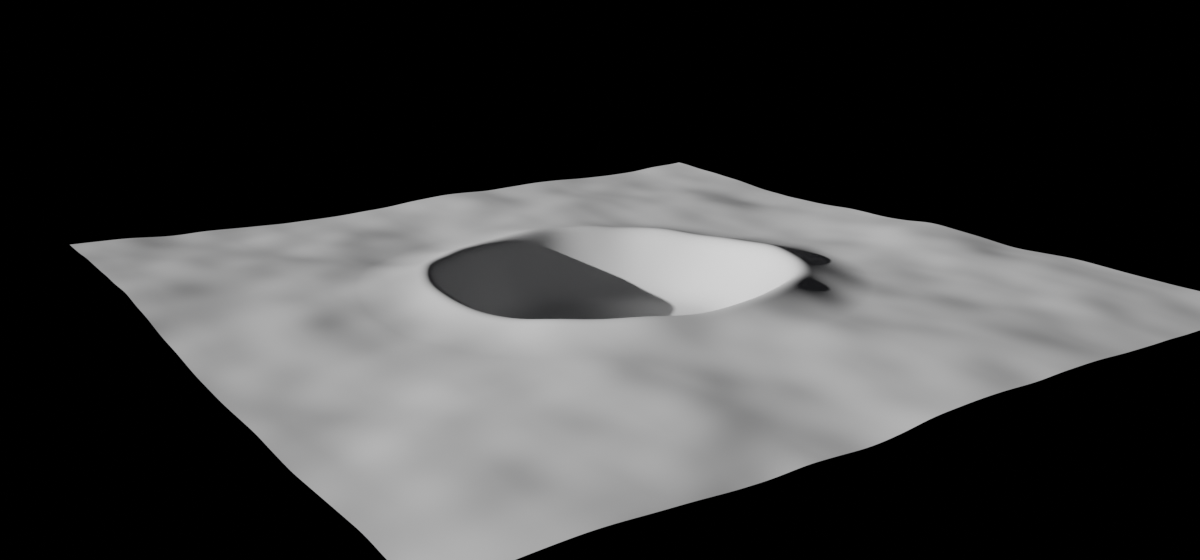
Try: open lunar_ground in the node editor and, on the crater_profile node, set floor_depth to −1.0: no floor left, a pure bowl. Then set rim_width to 1.0: a wider, gentler rim.
3. A crater in every cell
We want hundreds of craters and we will not place them by hand. VoronoiTexture cuts the plane into cells, each one around a random point.
For any position on the ground it gives two things we need:
distance: how far the position is from the point of its cell. It replaceslength(flat): every cell has its crater centred on its point.color: a random colour per cell, the same everywhere in the cell. Its three channels are three random numbers between 0 and 1 for each crater.
We spend these three numbers on the crater of the cell:
| Channel | Becomes | Range |
|---|---|---|
color.x | radius | 0.2 to 0.45 of a cell |
color.y | here: a crater or none | true in 80 % of the cells (density) |
color.z | age: old craters are shallower | full depth down to 30 % |
step3_cells.bn: crater_field, lunar_ground
Voronoi counts distances in cells, and scale is the number of cells per metre: radius / scale is the radius in metres.
randomness: 0.8 keeps the points from coming too close to each other. The texture is in four dimensions so that w can pick another set of cells: step 5 needs several.
Multiplying by here, a Boolean, gives 0 where the cell has no crater.
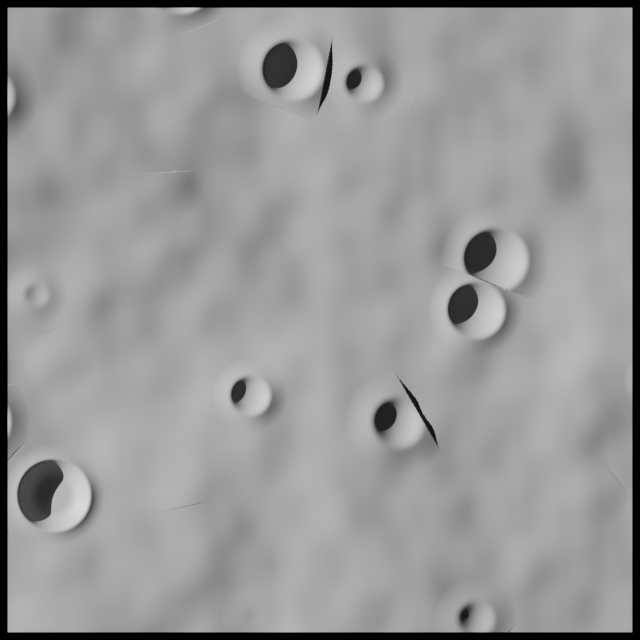
Those lines are borders between cells. A crater reaches 1.5 radii with its rim, up to 0.68 of a cell, but its cell's border may be closer than that. Across the border, the ground belongs to the next cell, whose crater is elsewhere: the height jumps from the rim to the plain in one row of vertices.
4. Fade out before the border
A second Voronoi, with the same cells, gives the distance to the nearest border instead (feature: DISTANCE_TO_EDGE): 0 on a border, more inside.
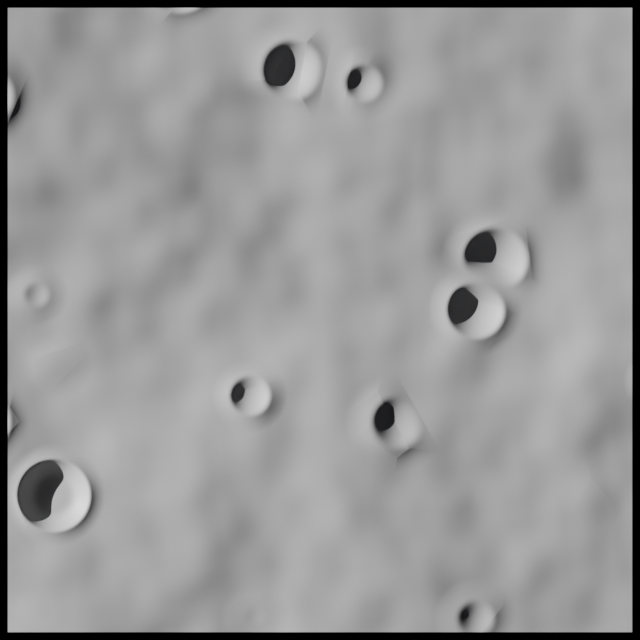
Clamp(edge.distance * 6.0) rises from 0 on the border to 1 one sixth of a cell inside. Multiplied into the height, it brings every crater down to the plain at its border.
Both sides of a border are then at height 0: nothing left to jump.
step4_fade.bn: crater_field
5. Craters of every size
The Moon has a few large craters and a great many small ones, inside and on top of the large ones. We add fields of craters one over the other, each one smaller and more numerous.
A repeat zone runs its body layers times and carries values from one run to the next: here the height summed so far and the scale of the next layer.
step5_layers.bn: lunar_ground
Each run doubles scale: twice as many cells per metre, so four times as many per square metre, each half as wide.
The height of a crater is proportional to its radius, so the small ones are also half as deep, without any extra line.
seed: iteration gives each layer the w of its own cells; without it, the small cells would line up with the large ones.
With craters at 0.8 and 5 layers, the scales are 0.8, 1.6, 3.2, 6.4 and 12.8 cells per metre. The largest craters have radii of 25 to 56 cm, the smallest of 1.6 to 3.5 cm: three to seven vertices.
Smaller ones would fall between the vertices. Those are for the material, in step 7.
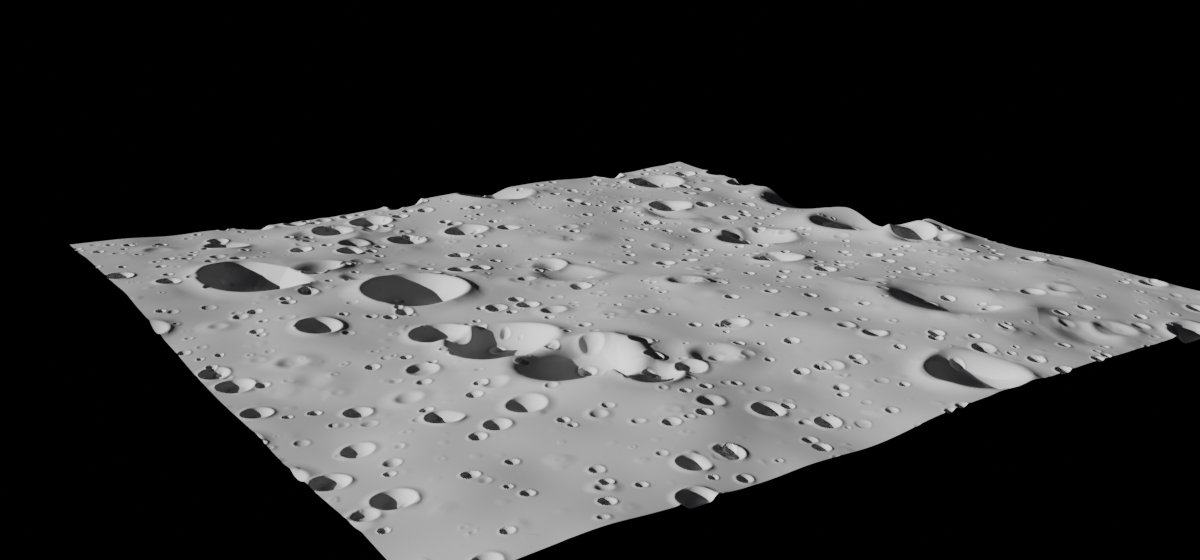
Try: set layers to 2, then to 7. At 7 the last layers are smaller than a vertex: raise resolution to see them, and watch the time it takes.
6. A slab under the ground
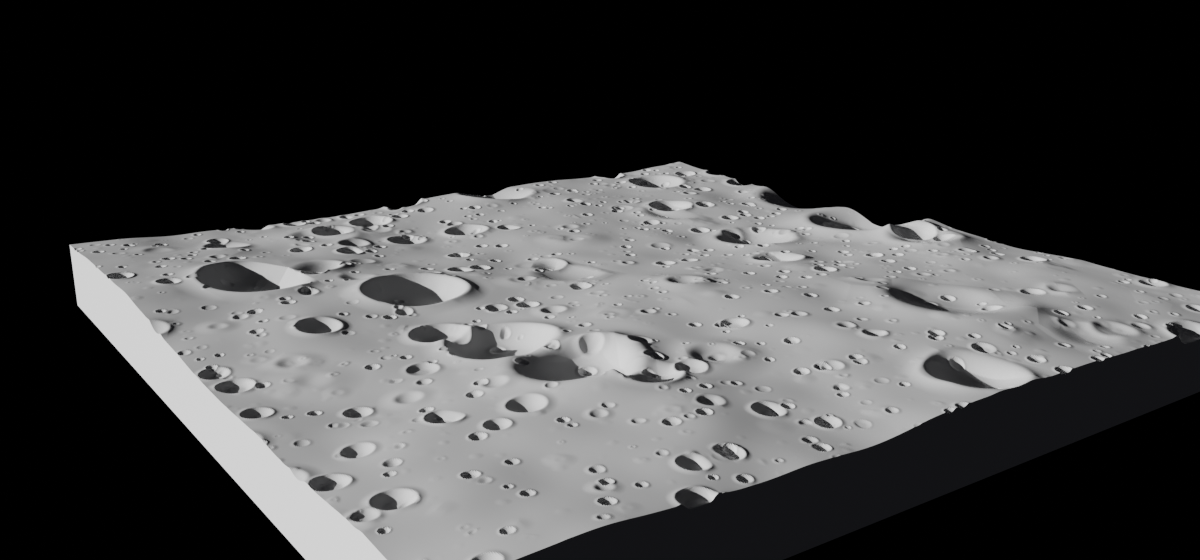
For a still, the square looks better as a sample cut out of the ground, with sides. The slab graph builds walls down from its border.
step6_slab.bn: slab, lunar_ground
- The border: an edge with only one face next to it (
EdgeNeighbors().face_count == 1). - Extrude these edges, in Edges mode: each one makes a wall face and a new edge below. The offset of Extrude Mesh follows the normals unless something is linked to it;
CombineXYZ(z: -1.0)links a vector straight down. - Flatten the bottom. Extrude Mesh numbers its new vertices after the old ones.
DomainSizecounts the points before the extrusion, soIndex() >= beforepicks the new ones, andSetPositionputs them all at the heightbottom.
7. Dust: the material
So far the ground has Blender's default grey. The material does two things Geometry Nodes cannot do well: details smaller than a vertex, and the colour of each point. It reads one value from the geometry: how young the nearest crater is.
Fresh craters on the Moon are brighter: the dust they threw out has not yet been darkened by the solar wind and micrometeorites. crater_field now returns young beside the height:
(1 − age)², full within half a radius of the centre and gone at 1.5 radii. The repeat zone keeps the youngest crater of all layers with max.
step7_regolith.bn: crater_field, lunar_ground
StoreNamedAttribute writes young on each vertex, under that name. It comes after SetPosition, so the field is computed on vertices that have already moved up or down.
That is why the cells are found from flat, X and Y only, since step 2: the moved vertex still finds the same cell, and the attribute matches the crater dug there.
step7_regolith.bn: Regolith
shader(material: true) graph Regolithis the node tree of a material named Regolith;SetMaterial(material: Regolith)at the end oflunar_groundgives it to the ground.Attribute(attribute_name: "young")reads, at each point of the surface, what the geometry stored on the vertices around it.TextureCoordinate().objectpins the noises to the object: they do not slide when the object moves.patches, a large noise, makes darker and lighter areas a metre or two wide. The grey is 0.07 to 0.15, and up to 0.2 more near young craters. The Moon reflects about an eighth of the light it receives.grain, a noise at scale 80, has bumps of about a centimetre.Bumpturns it into a normal: the sun lights each grain on one side, no vertex moved.roughness: 1.0: dust has no shine.
8. Details
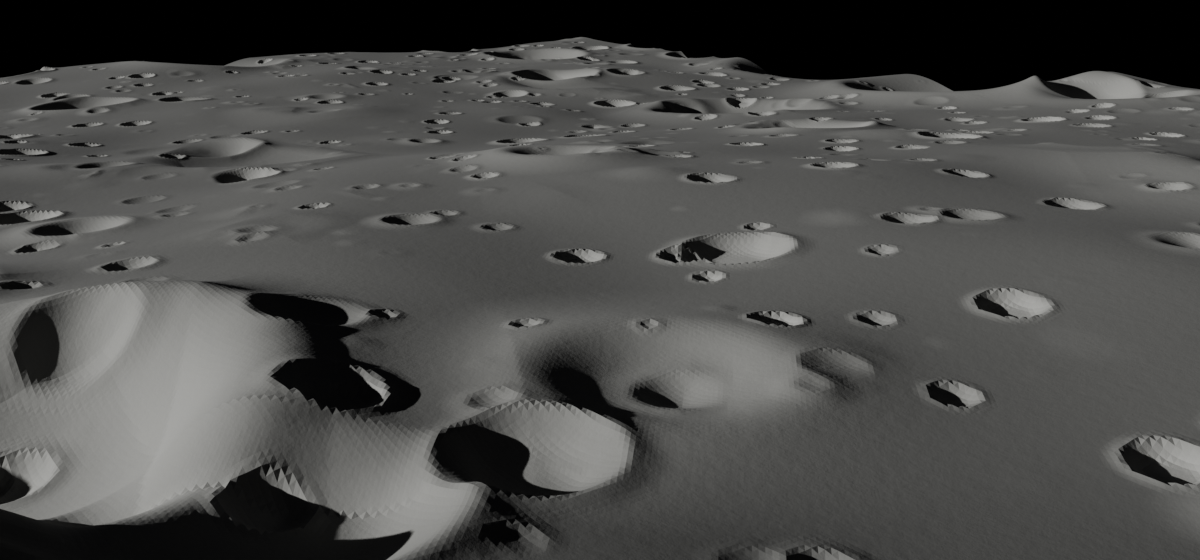
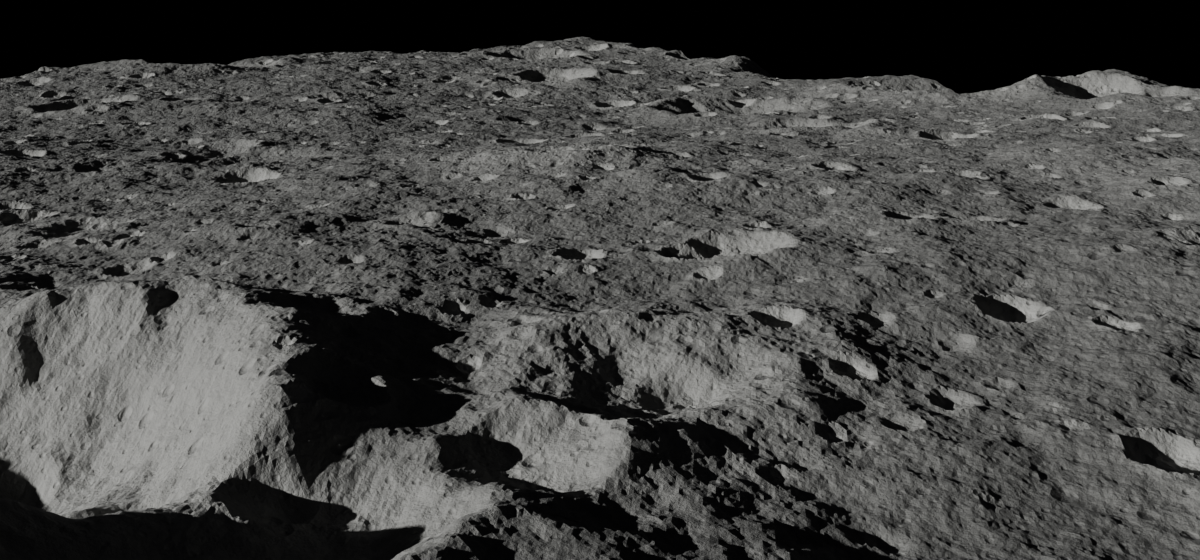
From a distance, step 7 holds up. Up close, it looks too clean: every crater is a perfect circle, the ground between them is smooth, and the grain of the material is the only thing smaller than the smallest crater. Real lunar ground is rough at every scale. This step adds detail at four scales, from the size of a crater down to the millimetre, with the same tools as before.
Rims that are not circles
In crater_field, the distance to the centre is now multiplied by a noise before it becomes x: between 0.85 and 1.15.
Where the factor is above 1, the point counts as further from the centre and the rim comes in. Where it is below 1, the rim goes out.
The noise has a scale four times the cells', so its bumps are a quarter of a cell wide: a few bulges per crater, not a ripple.
Its w is the seed, like the Voronoi's, so each layer of craters bends in its own way.
step8_details.bn: crater_field
Rough ground
In lunar_ground, a third noise joins the plain and the craters: rough, of scale 6 (bumps of about 17 cm) and detail 10.
Each level of detail adds bumps half as wide, and roughness 0.6 keeps them strong enough to matter. Multiplied by 0.05, the result moves the ground by a centimetre or two.
It is added to the craters, not mixed with them, so it covers their floors and walls as well as the plain.
A noise smaller than the space between vertices is lost: it lands on each vertex at random and makes jagged noise, not bumps.
So resolution goes from 800 to 1200, a vertex every 3.3 mm, and a sixth layer of craters fits: radii from 0.8 to 1.8 cm.
The price: 1.44 million vertices instead of 640,000, about twice the time to evaluate.
step8_details.bn: lunar_ground
Pits in the material
Below a few vertices, the geometry cannot help any more. The material can, with Bump, which fakes relief in the light without moving anything.
We would like to call crater_profile from the material, but it is a Geometry Nodes graph of this text, and a shader tree only calls shader graphs of the same text.
pits is a simpler crater, written for the shader: the bowl alone, min(x * x - 1.0, 0.0), with no floor and no rim. At this size, nobody sees them.
step8_details.bn: pits
It is crater_field again, with two differences forced by the shader tree. There is no Compare node: Math with operation: LESS_THAN gives 1 or 0, which serves the same purpose.
And it has no seed: the two layers already differ by their scale, and the second one is called on a shifted position so that the two do not share their cells around the origin.
step8_details.bn: Regolith
relief sums the grain and two layers of pits, at 40 and 110 cells per metre: pits of 4 to 9 mm radius, then of 1.4 to 3.2 mm.
Every term is a height in metres, like the geometry's: a pit is half its radius deep, as a crater is.
Bump with distance 1.0 and strength 1.0 reads its height in those units, so the material's relief and the geometry's are lit the same way.
The grain gets the same treatment: its bumps now span 4 mm of height.
Try: set resolution back to 800 and look at the slopes: the noise of rough gets jagged. Then set the strength of Bump to 0.0 to see what the pits and the grain do alone.
The light does half the work
The Moon has no air. No sky lights the shadows, so they are nearly black, and the Sun is the only source. The same ground looks very different depending on how high the Sun stands:
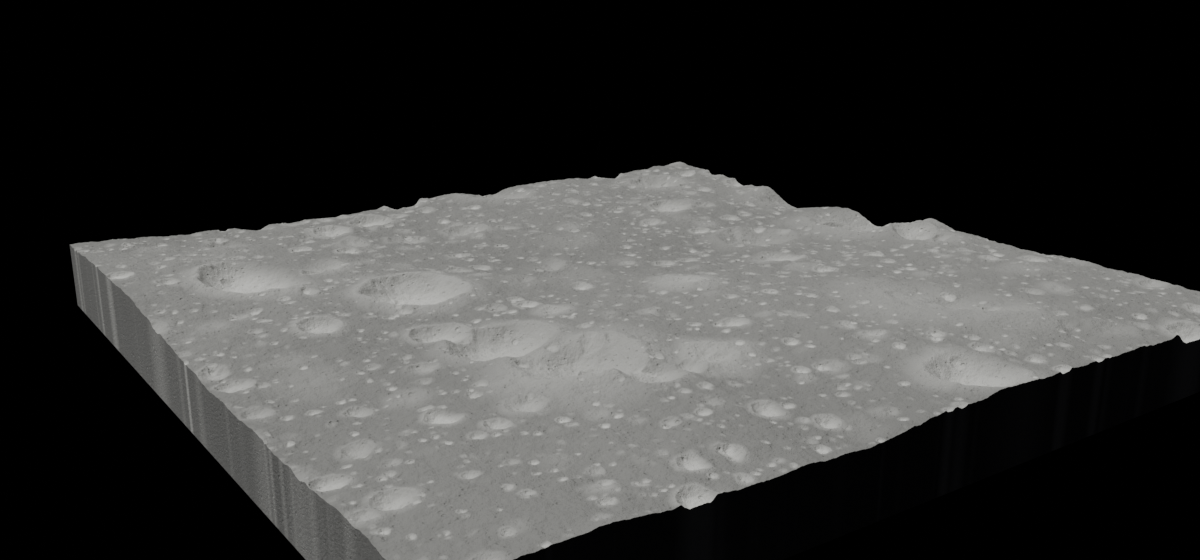
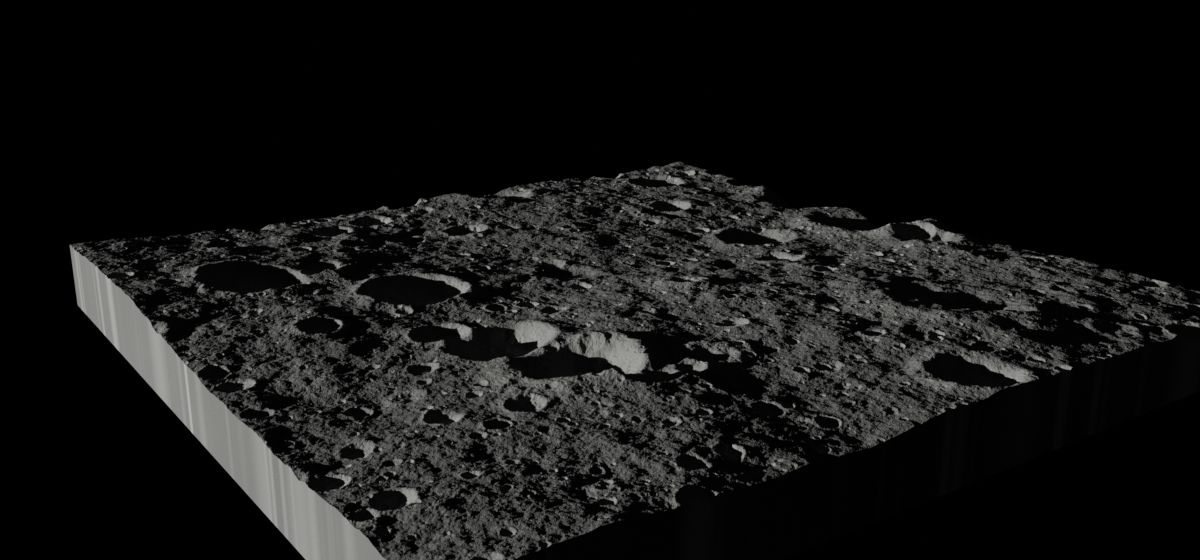
The pictures of this page use these settings:
| Setting | Value | Why |
|---|---|---|
| Sun, elevation | 14° (rotation X = 76°, Z = −110°) | Low enough for shadows in every crater, high enough to light their floors |
| Sun, angle | 0.5° | The size of the Sun seen from the Moon: sharp shadows |
| Sun, strength | 7 | A dark ground under a strong light, as on the Moon |
| World colour | (0.012, 0.012, 0.014) | Almost black: a trace of light in the shadows, as the ground around would send back |
| Film, transparent | on | The background stays black whatever the world colour |
| Render engine | Cycles, 96 samples, denoised | Shadows cast by the craters onto each other |
Take it to Blender
The finished ground, in one file. Drag the card onto empty space in Blender's 3D Viewport and keep Instantiate the Example: a new object carries lunar_ground. A click on the card downloads the file.
The steps before it, to start again from any of them:
The files, with the script that renders this page's pictures, are in examples/tutorials/lunar_ground/.